One everyday workflow that I wanted to optimize was quickly sketching out a diagram on the reMarkable tablet and including it in a document I was writing somewhere else.
My primary computer is a Mac. Here’s my solution:
-
Set up
reSnap. This step requires changes on both the reMarkable tablet and the local machine. For the former, I followed the instructions in theREADMEfile. For the latter, I only really needed to installFFmpegandImageMagick. - Create a Mac Quick Action to invoke reSnap.
- Bind a hotkey that grabs the snapshot of the reMarkable display, cleans it up, and sticks it in Mac’s clipboard.
Details instructions follow. I can now just hit ⌘+⌃+⇧+P to grab the snapshot and then hit ⌘+V to paste it into whatever application I am using, usually Google Docs.
Setting up reSnap
I have
my fork of reSnap, which adds a few valuable tricks like cleaning up the image and
placing it in the system clipboard. By default, the upstream
reSnap script attempts to preview the image using
feh (an image viewer I’ve never heard of). Immediately
viewing the picture wasn’t useful to me, so I made that optional. You
can grab my fork of reSnap
here.
On the reMarkable tablet side, you must follow the instructions in the
README file to install lz4 and
head on the device.
It is important to set up SSH to use password-less logins since the hotkey method relies on being able to connect without prompting for a password. See instructions for setting up SSH for passwordless login.
On the local machine – which in my case is a Mac – you can install all the requirements using Homebrew as follows:
brew install ffmpeg imagemagickCreating a Mac Quick Action
-
Start “Automator.”
-
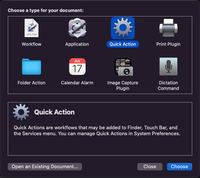
Create a new “Quick Action.”
-
Set up the workflow options to receive no input in any application. All the other options are up to you, or you can leave them as-is.

-
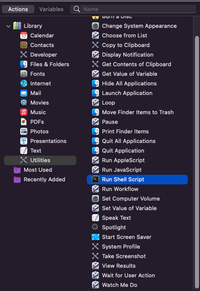
Drag over the “Run Shell Script” action from the actions library.
-
Paste something like the following (with the suggested modifications to suit your local environment).
/usr/bin/env PATH=/bin:/usr/bin:/usr/local/bin:/sbin /path/to/reSnap/reSnap.sh --sketch --copyNote that the reMarkable needs to be connected via a USB cable to capture a snapshot using the above command. If you want to be able to use WiFi you should use the
--hostoption to specify either the local hostname (usually “remarkable”) or the IP address. In all cases the hotkey should only be expected to work when the reMarkable is not sleeping. -
If you’d like, you can also add a “Display Notification” action, so you know when the script is done running. The
FFMpeginvocation may take a few seconds.
Try it out with the “Run” button.
Binding a hotkey
Once you save your quick action, you can bind a hotkey like this:
-
Open “System Preferences” and navigate to “Keyboard” -> “Shortcuts”.
-
Click on “Services” and scroll to the bottom. You should see the new quick action you just made listed under the “General” category. It should have no keys assigned to it.
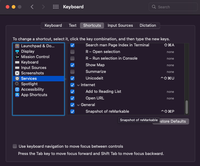
Double click on the “none” and type your hotkey.
That’s it.
Here’s what a snapshot looks like:

A couple of notes on the --sketch option
My fork of reSnap introduces a
--sketch option that cleans up the picture a little bit.
It currently does the following:
-
Erase the little menu widget from the top-left corner of the image.
Since
reSnapgrabs the image right off the framebuffer this little artifact makes its way to the resulting image. - Erase a tiny little black dot that appears in the bottom-left corner of the image. I don’t know where this one comes from, but it’s there.
- Make the background transparent.
- Resample the image at 50% resolution with anti-aliasing. The original image is a stiff monochrome image with a white background and black strokes. The resampling after making the background transparent makes the edges smoother and a bit easier on the eyes. Otherwise all the edges look jagged.
- Trim the image to remove all the empty borders thus making the image size just large enough to hold the actual image.
All of this is done via an invocation of ImageMagick.